Four Synths in One: Multi-Parts on the 3rd Wave
Press a single key on the 3rd Wave and you might be hearing four completely different synthesizers at once. That is the idea behind multi-parts, and it is one of the most powerful and most overlooked features on the instrument.
In this first episode of Patching In, we take you through multi-parts hands-on, and the video above is the fastest way to see it all working. This post goes a little deeper, fills in the corners we don’t have room for on camera, and leaves you with a few recipes to try on your own instrument.
Let’s patch in.
Four Parts, One Instrument
Every program in the 3rd Wave 24K and 24M is 4-part multitimbral, i.e. built from four parts. You don’t have to use all four, but you always have all four available. That is true of every single program on the instrument.
Here is why it matters: Each part is a complete, independent program in its own right, with its own three oscillators, filters, envelopes, mod matrix, arpeggiator, sequencer and up to two effects. Load a different program into each part and you have four full synth voices running inside a single patch.
A quick word on voice count. On the 24-voice models, the 24 voices are shared across whatever parts are active (the part button is lit). One active part gets all 24. With two parts it is 12 each, with three it is 8 each, and with four it is 6 each. The exception is splits and the sequencer, which both hand out voices dynamically as they are needed, so you are not locked into an even split. We’ll come back to that at the end.
If you are working on the compact 8M, the same thinking applies with two parts instead of four. The 8M is bi-timbral: a single active part gives you all 8 voices, and with both parts active, you get 4 voices each. You are layering or splitting two independent programs rather than four, but everything below about navigating, mixing, and panning your parts works the same way. And as on the 24 voice, the splits or sequenced parts are dynamically allocated.
Lit vs. Blinking: Hearing vs. Editing
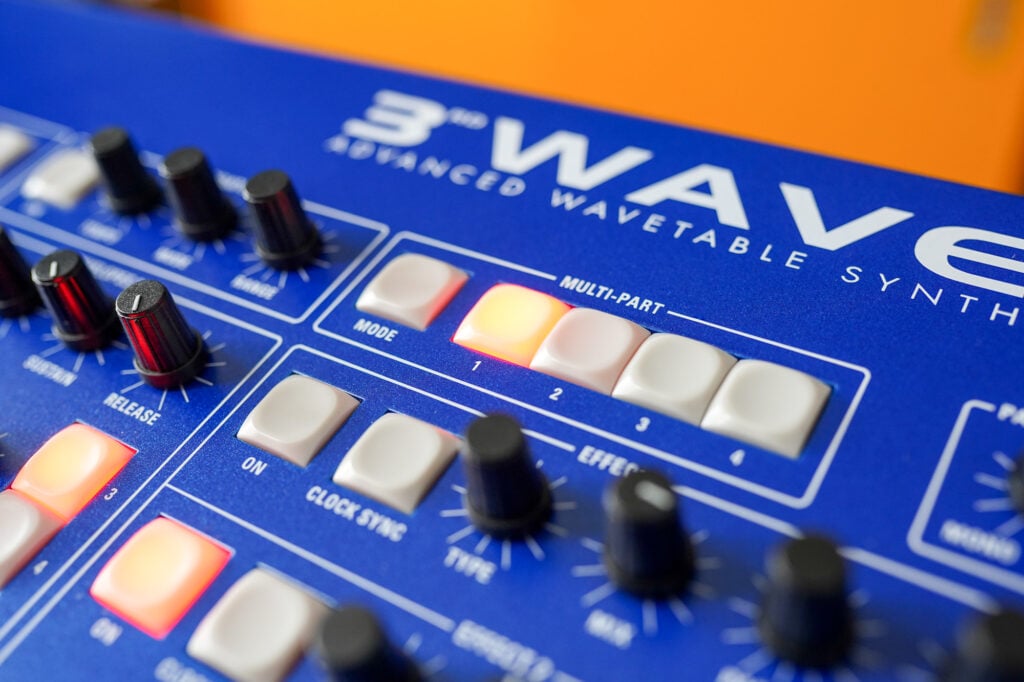
This is the single most important thing to understand about multi-parts, and it is the part that trips people up. Each of the four numbered MULTI-PART buttons, next to the MODE button, has three states, and it is worth slowing down to learn what each one tells you:
- Unlit: the part is not active and not audible.
- Lit (solid): the part is active and audible, but not selected for editing.
- Lit (blinking): the part is active, audible, and selected for editing.
So here is the one rule to keep in your head: whatever is lit is what you are hearing, and whatever is blinking is what you are editing. By editing, we mean that any changes you make on the control panel is going to any and all of the blinking parts.
That matters because the 3rd Wave is a knob-per-function instrument. When you grab the filter cutoff, it edits the part or parts that are blinking, and with four parts in play, you have to know what you are working on. Before you reach for a knob, glance at the buttons and make sure you are about to change what you think you are changing.
Editing more than one part at once
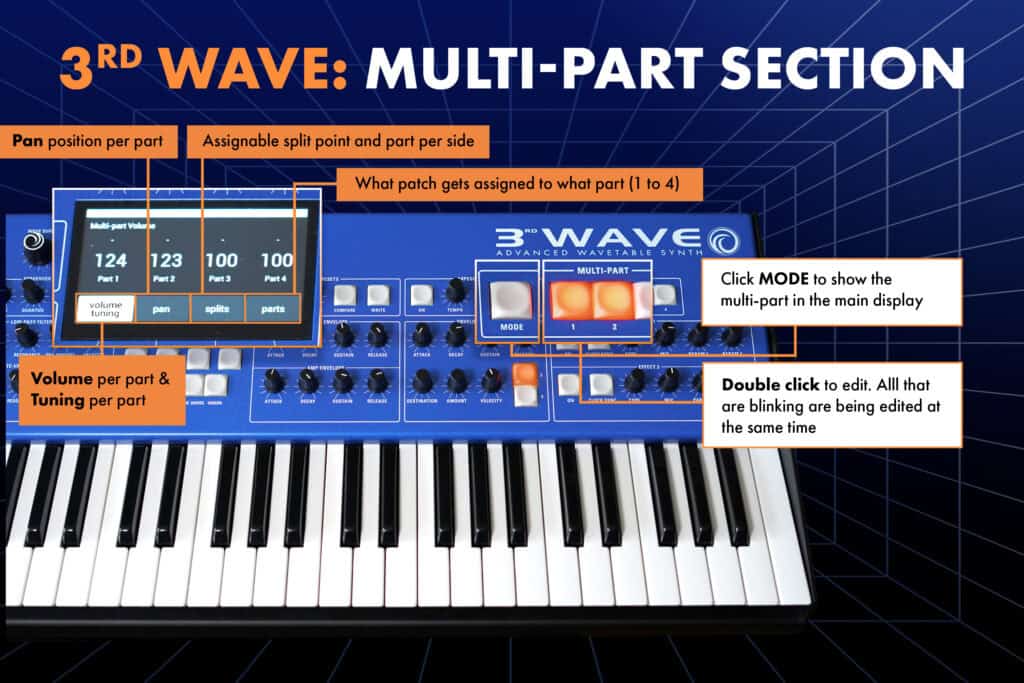
A lot of the time you will want to move several parts together, and there are two ways to do it. The quickest is to double-press the active MULTI-PART buttons you want, at the same time, so only those blink and a knob move lands on all of them together. You can also hold MODE and press a solidly lit MULTI-PART button to make it start blinking and turn on editing. You can hold MODE and press a blinking one to turn its editing off.
When you have several parts selected and want to change which one shows on the screen, hold one of the buttons until it stops blinking. This one is worth getting into your fingers. Whenever you want to edit two hard-panned halves of a patch at the same time (a binaural program), double-press them so they blink together, and one knob move adjusts both.
Volume, Tuning, and Pan: Mixing Inside a Patch
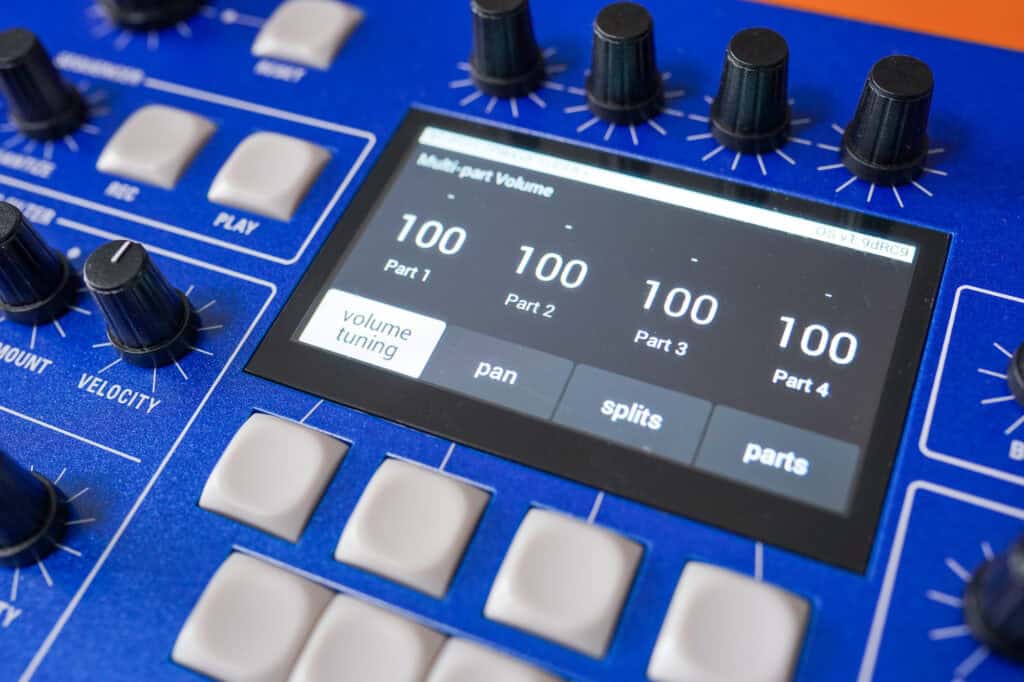
Press MODE and the display becomes a small mixer for your four parts. The soft buttons along the bottom walk you through it. Volume and tuning let you balance the level of each part and then detune the parts against each other by up to one semitone up or down. Pan places each part in the stereo field, from -50 hard left, through 0 in the center, to +50 hard right. And the parts page lets you copy a single part of any program into any of your four parts.
Detuning, which you get to by pressing the volume/tuning button, is where parts start to sound bigger than the sum of their pieces. You are not only detuning the oscillators inside one sound (which you can also do within the oscillator sections), you are detuning whole parts against each other. A few cents of spread between two parts thickens a patch in a way a single program never will, and a lot of detuning can take you somewhere strange.
The parts page is quietly one of the most useful screens on the instrument. Say you love the bass in program 20, but you are building something new. You can pull just part three out of program 20, drop it straight into your current patch, and keep going.
Building Huge Stereo/Binaural Patches
Here is a recipe worth saving: because each part can be panned on its own, you can turn a program that started life in mono into a wide stereo/binaural patch:
- Select the program you want to widen and activate Parts 1 and 2. Press MODE, then the parts soft button, and copy that program into both Part 1 and Part 2.
- Press MODE, then the pan soft button. Set Part 1 to -50 (hard left) and Part 2 to +50 (hard right).
- Turn the front-panel PAN SPREAD knob fully counter-clockwise to mono, which keeps the voices at their static pan positions instead of ping-ponging per voice.
- Edit one of the two parts so they are not completely identical. Slight changes to the wave envelope positions or times, the ADSR envelope times, LFO rates, the filter cutoff, or the tuning all work well.
- Play a chord. You will hear a true stereo/binaural version of the program.
That 4th step is the secret. Two identical hard-panned parts will likely sound like a louder mono patch. We do have some secret sauce going on between the two identical programs, but the small differences between the two sides are what your ears read as space and width. Letting time-based parameters drift apart so the channels evolve at slightly different moments is what deepens the binaural effect.
To take that effect to its most literal, detune one of the two hard-panned parts a few cents against the other and listen on headphones. Those two slightly different pitches, arriving separately in each ear, set up a slow pulsing beat that seems to drift around inside your head. It is an old sound-design trick, and the per-part tuning and panning here make it easy to dial in.
One more detail worth filing away. If you leave a part’s pan at 0, in the center, the front-panel PAN SPREAD knob takes over and pans each new voice alternately left and right as you play. That is the old-school PPG way of doing it, a flavor of stereo that moves with your playing. Static multi-part pan and per-voice pan spread are two tools for two different jobs.
Stacks and Splits
A stack is the simplest multi-part setup: two or more parts active across the full keyboard, all sounding together every time you press a key. That is layering. Switch on the parts you want, balance them with the volume controls, and you are stacking.
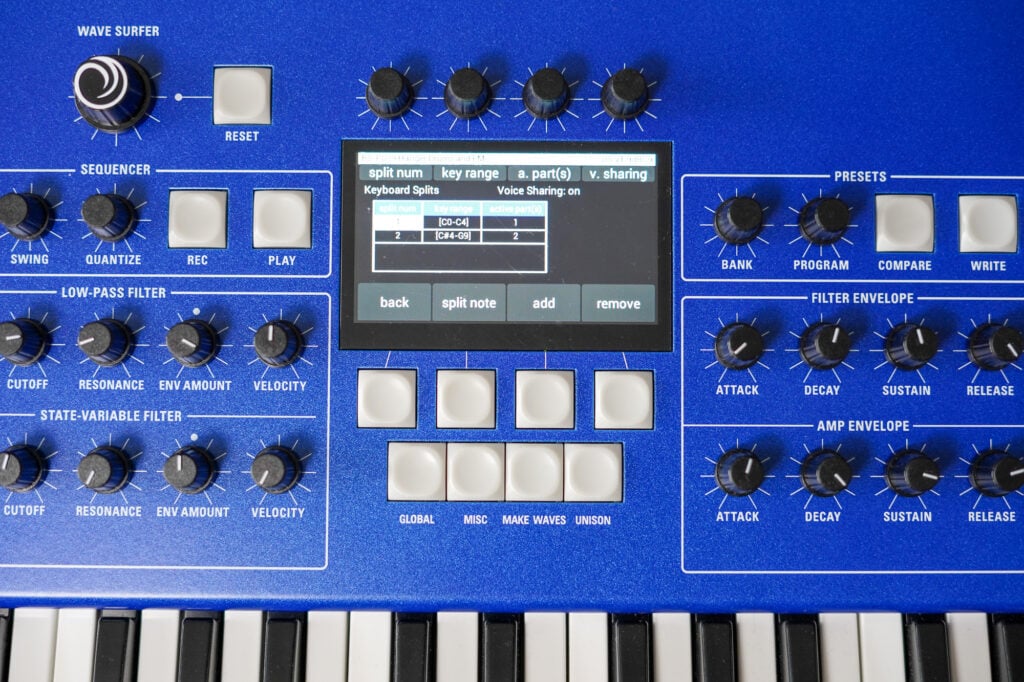
A split assigns different parts to different sections of the keyboard, so you can play a bass with your left hand and a lead with your right. Here is how to build a three-zone split:
- Build a program with different sounds on Part 1, Part 2, and Part 3, for example a bass, a pad, and a lead.
- Press MODE, then the SPLITS soft button 3. Part 1 is automatically assigned to Split zone 1, if it is the active part, but you can change the active part for this split by changing the a.part soft knob in this window.
- Press the add soft button to assign Part 2 to Split zone 2, then press add again to assign Part 3 to Split zone 3. And again, change the active part for either of these if you want a different part for either of these splits.
- If you have more than one active part, they will both be part of this split when using the ADD soft button to add them to a split zone.
- To set a split point, use soft knob 1 to scroll to any zone higher than the first zone, then hold the split note soft button and press a key on the keyboard. That key sets the low note for the currently selected split number, and it sets the high note to one note below what you selected for the split number right below this.
- Save the program when you have finished.
As shown above, you are not stuck with one part per zone, either. You can stack several parts within a single zone for a layered split, and a voice-sharing setting determines whether a part can appear in more than one zone. That is how you put a thick left-hand layer under a single lead, all in one patch.
Four-Part Multi-Timbral Sequencing
Multi-parts really open up once the sequencer gets involved. Each part carries its own sequence track for every pattern, so a single 3rd Wave program can play a rhythmic part, a bassline, a chord stack, and a lead all at once, each on its own part, with no outboard gear at all. A whole arrangement can come out of a single program with four parts. This is the four-synths-in-one idea taken to its natural end.
It is also where that dynamic voice allocation earns its keep. Instead of locking each part to a fixed slice of the 24 voices, the sequencer hands voices out as the parts call for them, so a busy part can borrow voices from a simpler one.
If you are tracking multitimbral arrangements into a DAW, it helps to know you can route each part to its own physical output pair on the back panel and record each one to a separate track. That keeps your parts independent and editable long after you have stepped away from the instrument.
We’re only scratching the surface of the sequencer here, because it has earned an episode of its own. That is what is coming next: Episode 2 of Patching In takes you all the way inside the 3rd Wave sequencer.
Start Patching In
Multi-parts turn the 3rd Wave from one synth into four, whether you are stacking lush layers, splitting the keyboard for a live gig, widening a patch into true stereo/binaural, or sequencing a whole song arrangement out of a single program. The best way to learn it is to load up a four-part preset, watch which buttons are lit and which are blinking, and start turning knobs. Then turn parts off and on just like using a mute switch on a mixing board.
Watch the full episode above, and when you are ready to get your hands on a 3rd Wave, find your nearest dealer here.
We’ll see you in the next one.