
Inside the 3rd Wave Sequencer
There is more to the 3rd Wave than its five types of synthesis and Dave Rossum-designed analog filters. Built into the instrument is a pattern sequencer, and it is one of the quickest ways to catch an idea before it gets away. When a musical idea strikes, you can record it right there on the keyboard, with no other gear in the room, then string those patterns together and start building a song. Think of it as a sketch pad first and a song arranger second. And when you want to bring in the rest of your setup, it syncs with and feeds your other gear over MIDI, so it fits just as easily into a DAW session or more complex performance rig.
In the video below, we walk through it on the instrument, from a four-part song already playing to recording a fresh pattern and adding some filter movement. This post fills in the details around that: recording patterns in real time, capturing parameter automation, arranging patterns into a song, and using the sequencer with external gear.
Let’s patch in!
A pattern sequencer, MPC style
The first thing worth knowing is what kind of sequencer this is. It is a pattern- and song-based sequencer, close in spirit to an MPC-style pattern drum machine and not a traditional step sequencer. You do not punch notes into a grid one step at a time. You play a pattern in real time, the sequencer captures it, and later you string those patterns together into an arrangement. If you were hoping for a classic step grid, there is a clever workaround we will get to, but the heart of the instrument is real-time pattern recording.
The scale of it is generous: Each program holds up to 24 different patterns, and each pattern can run up to 32 measures. On the multitimbral models, the sequencer keeps one sequence per part, so a four-part program gives you four independent tracks moving at once, each with its own patterns. If you play a drum kit on one part, a bass on another, and a pad on a third, the sequencer lets each of them live on their own independent track, all locked to the same clock.
When you run a multi-part program, the sequencer dynamically allocates the available voices as needed. Picture a four-part program with a sequence on each part: if ten notes are being used by Part 1, and part 2 only needs two voices, all of both part’s voices will play, as long as the other two parts are not using more than the remaining 24 voices.
A quick word on which instrument you have, because the product family is not uniform. The 24-voice keyboard (24K) and the 24-voice module (24M) are four-part multitimbral with 24 voices, and those voices are allocated as needed across all four parts. The 8M is bi-timbral, meaning two parts, with eight voices split as eight for one part or four each for two. The 8M will also dynamically allocate voices between the two parts as necessary during bi-timbral sequencing. The sequencer itself is available on all three units, and the steps in this post are anchored to the 24-voice models we demo in the video. Where the 8M differs, reach for the 8M manual so the soft button and knob names match what you see.
If the multi-part side of this is new to you, that is a whole topic of its own. We covered it in Episode 1: Four Synths in One, and this episode is really the payoff, the moment those independent parts start to become one arrangement.
Important note: If you are going to do multi-part sequencing (independent sounds and music lines on each part), it is advisable to go into the Global menu, scroll down to the MIDI parameters, and turn MIDI Multitimbral Mode to On. With this on, each part is on its own MIDI channel. With it off, even if you are sequencing four different tracks with different sounds, everything will be transmitted on the same MIDI channel.
Recording a pattern in real time
Everything starts with a single pattern. The workflow is quick once it is in your hands: arm the sequencer, take a four-beat count-in, and play. Because you’re recording live, the feel of what you play is preserved, and you build up complexity by overdubbing pass after pass while the pattern loops.
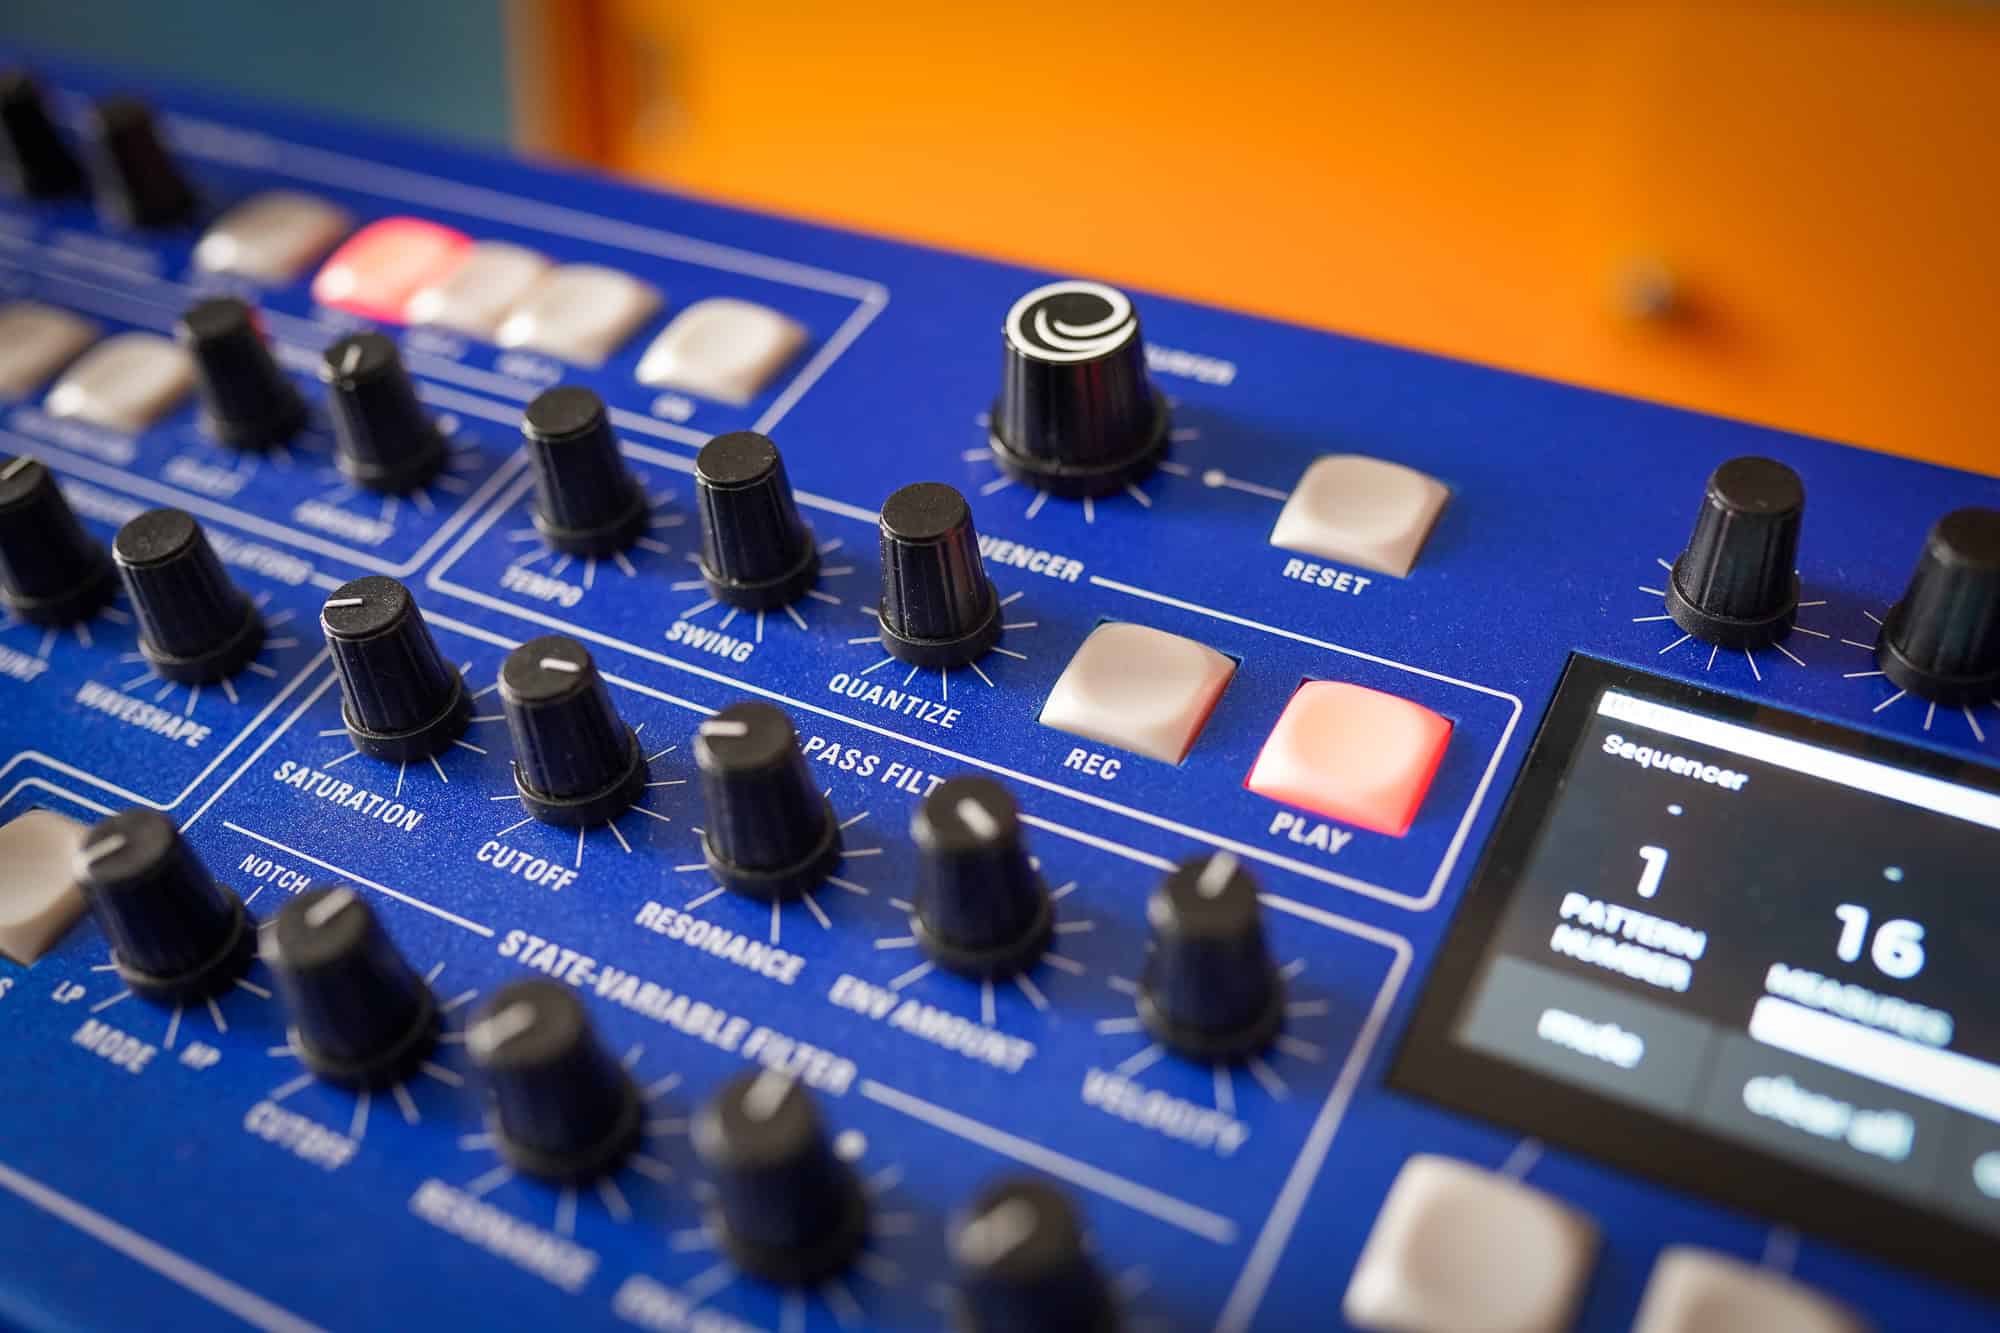
Just like in life, timing is everything. Soft knob 3 sets a quantization value, which pulls the notes you play onto a chosen grid, anywhere from 32nd notes up to quarter notes, triplets included. You can also set quantization to off, and then the sequencer records exactly what you played, with a resolution of 960 pulses per quarter note and no correction at all. The part we love: quantization is non-destructive. Change it after the fact, and the sequencer still remembers precisely how you originally played the notes in, so you can audition a tight grid and then loosen it back to your raw performance without losing anything. There is a swing setting too, again in the MPC tradition, for when straight time feels a little stiff.
To record a pattern:
- Select a program.
- In the SEQUENCER section, press any button or turn any control to show the Sequencer controls in the main display.
- Use soft knob 1 to select which pattern you’d like to record to. Note: Factory presets usually come with factory patterns. If you’re starting from a factory preset, we recommend clearing the pattern by pressing the CLEAR ALL button (soft button 1) first. Alternatively, pick an empty pattern by turning the knob.
- Use soft knob 2 to set the number of measures in the pattern.
- Use soft knob 3 to set a quantization value. This forces the notes you play to align to the chosen value. You can set quantization to off, and the sequencer will play back the notes exactly as you played them without correcting their timing. Quantization is not permanent/destructive.
- Press the RECORD button. It flashes to show it is ready to record.
- Press the PLAY button. The click track plays a four-beat count-in. Turn the TEMPO knob on the 24-voice keyboard or press the TAP TEMPO button twice to set a tempo on the 24-voice destkop, or use the BPM control (soft knob 1) in the display to adjust it.
- When the click loops around to the beginning of measure 1, play a series of notes or chords. You can keep adding (overdubbing) notes as the pattern repeats.
- If you make a mistake, press soft button 1 (clear all), then repeat steps 6 to 8.
- To stop recording but continue playing, press the RECORD button.
- To stop playback and stop recording, press the PLAY button.
- To save the sequence, save the program by pressing the WRITE button twice – this saves the whole program with your sequence.
Two things will help as you sequence.
1. If you want to hear the click more clearly while you track, go to the MISC area, turn the metronome volume up, and pick a metronome sound with a sharp attack so it cuts through.
2. You do not have to clear a whole take over one bad note. While recording is active, a soft key lets you erase individual notes or control moves as they loop past, so a stray note is a quick fix rather than a restart.
The multi-part angle deserves a note here. To build a clean multitimbral pattern, record one part at a time, switching which part is active between passes, exactly as we do in the video when we lay down the drums first and then move to the next track. The sequencer treats the material for each part as its own independent track regardless of how it was recorded, and you can clear those tracks selectively with the clear part, clear params, and clear notes buttons, or wipe everything for all parts at once with clear all. The mechanics of selecting and activating parts live back in Episode 1, so we will keep it light here.
Recording parameter automation
The sequencer records more than notes. With parameter recording turned on, any front-panel move you make while the pattern records is captured as part of the sequence, whether that is the filter cutoff opening across a few bars, the mix value of an effect, or a shift in envelope or oscillator settings. It all plays back exactly as you performed it. In the video episode, we record a filter sweep and a waveform change into a track at the same time, and you hear both moves repeat on playback.
The way it records is worth understanding so you stay in control of it. As the pattern loops, the sequencer continuously updates whatever parameter you are moving. Keep turning the knob, and it keeps writing new automation over the old. Stop turning it, and the sequencer stops updating that parameter and preserves whatever automation is already there. So the loop point matters: be aware of where the pattern comes back around, because a knob you are still holding when it loops will overwrite what you did the first time through.
To record parameter automation:
- Start playback of an existing sequence by pressing the PLAY button in the SEQUENCER section.
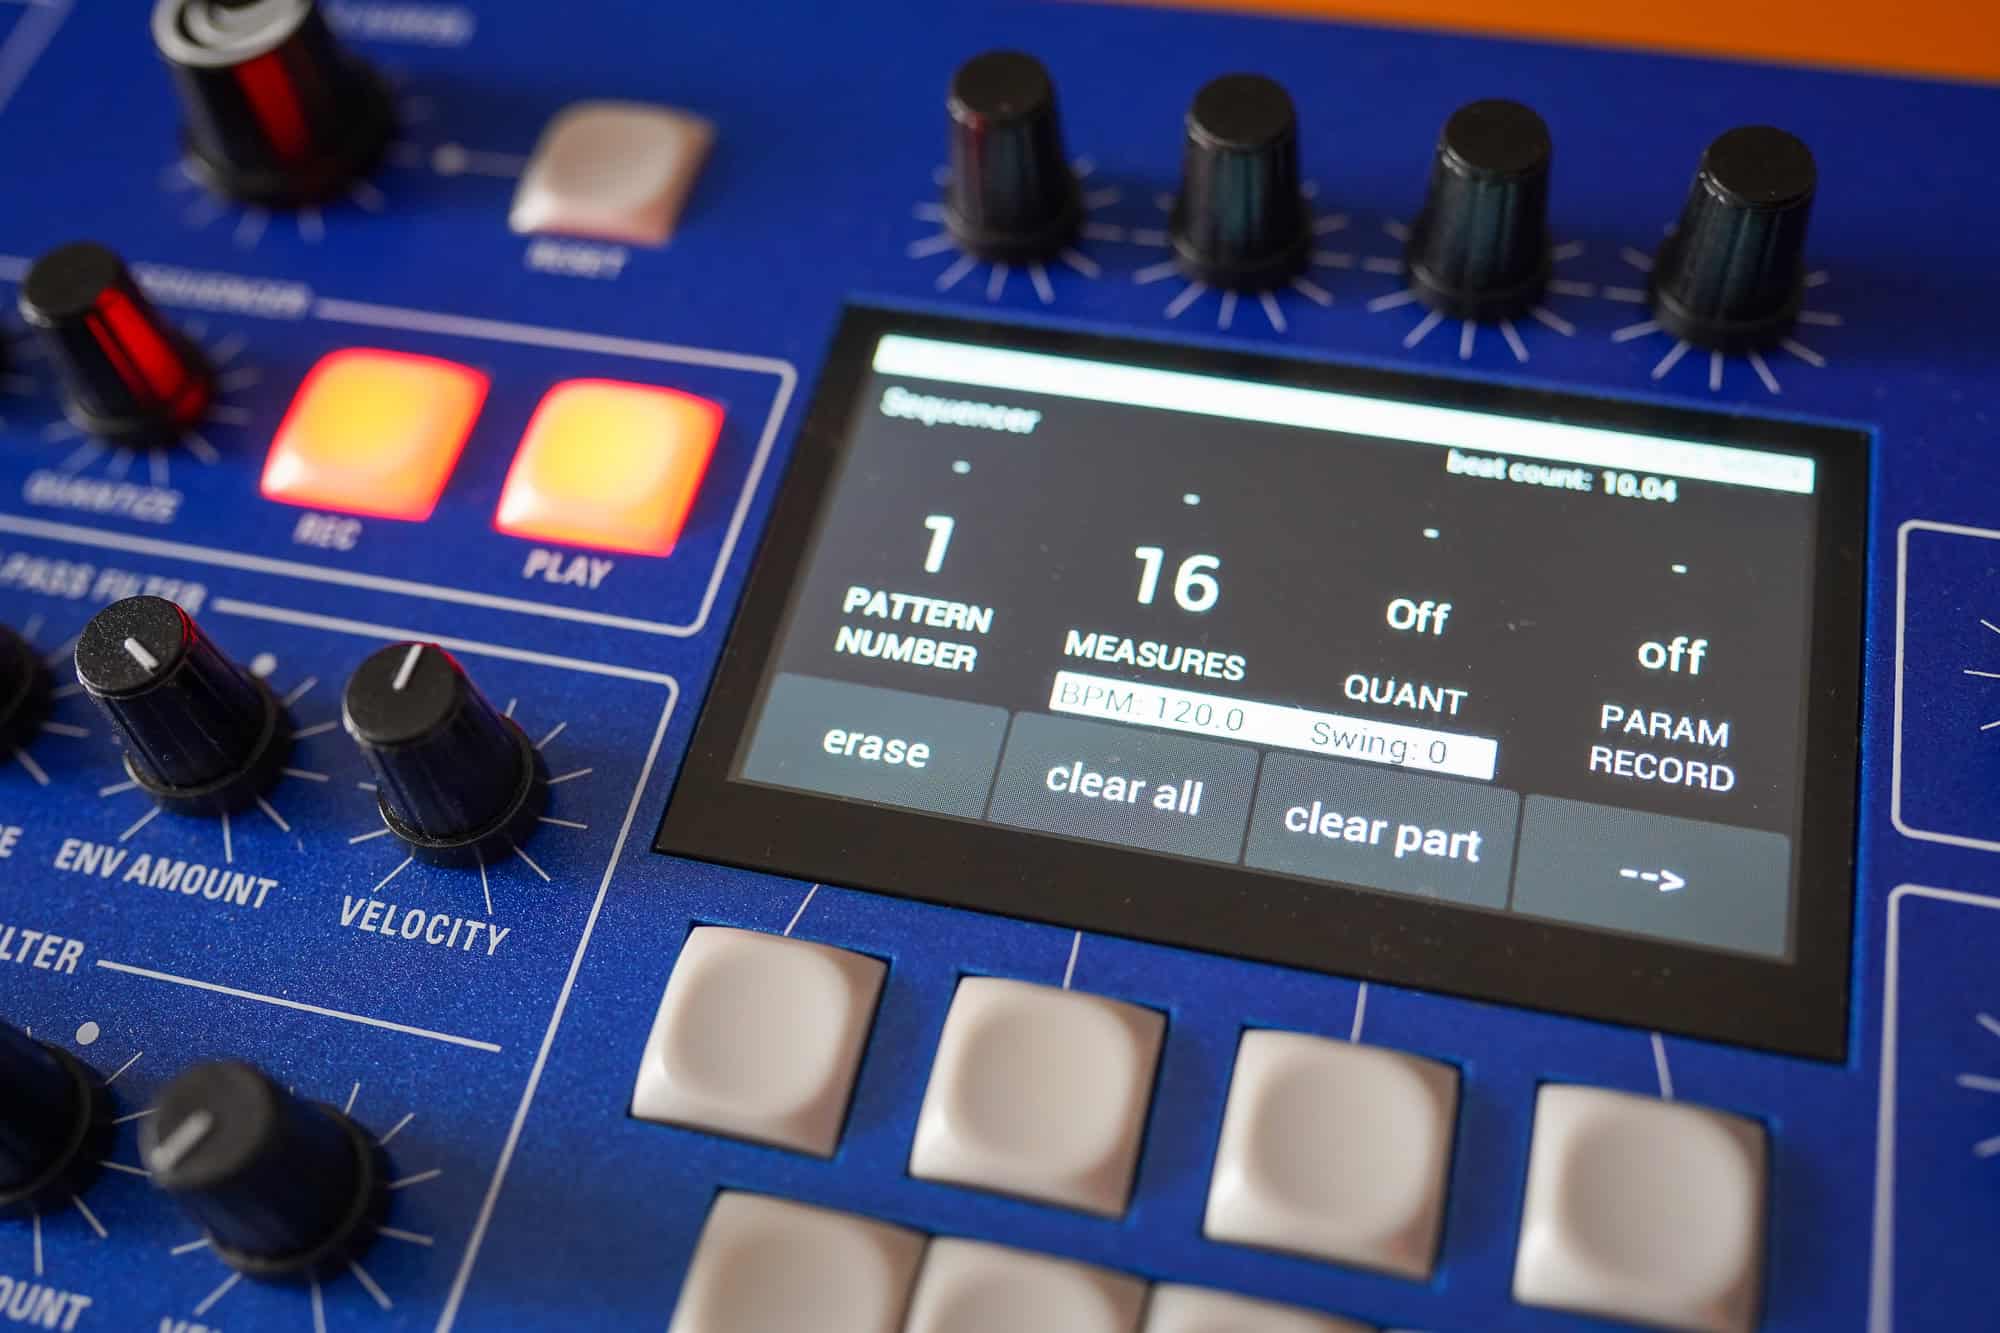
- Use soft knob 4 to set PARAM RECORD to on.
- Press the RECORD button in the SEQUENCER section.
- As the sequence plays, adjust a parameter such as filter cutoff.
- To clear parameter automation, press soft button 2 (clear params), and all parameter sequencing is erased.
- To stop recording, press the RECORD button.
- To stop playback, press the PLAY button.
- To save the sequence, save the program by pressing the WRITE button twice.
On multi-part programs, this extends to the mix itself. You can record per-part changes in volume, pan, and tuning, so a part can swell in, drift across the stereo field, or detune slightly as the song moves. And this is also the door to that step-sequencer workaround we mentioned: because any parameter can be written in by hand, you can slow the sequencer right down, carefully play your notes and moves, and then bring the tempo back up on playback. Not a dedicated step sequencer mode, but it gets you to a similar place when you want that kind of precision.
Two other items will help as you create your sequences:
- You can copy one pattern to another at any time, and both the notes and the parameter automation come along with it, which is a fast way to make a variation: copy Pattern 1 to Pattern 2, then tweak.
- During playback for either a pattern or a song, you can press and hold the mute soft button to drop the active parts out for as long as you hold it, so you can audition an arrangement with a part pulled back without editing anything by just using the mute key.
Building a whole song from your patterns
Once you have a handful of patterns you like, Song mode is where they become an arrangement. A song is an ordered list of patterns with a repeat count on each entry. Each song can hold up to 24 patterns, and each one can repeat up to 64 times, and the whole song can loop endlessly if you want it running under a jam.
To arrange a song:
- In the SEQUENCER section, press any button to show the Sequencer controls in the main display.
- In the sequencer menu, press soft button 4 (right arrow) twice. Additional Sequencer parameters appear.
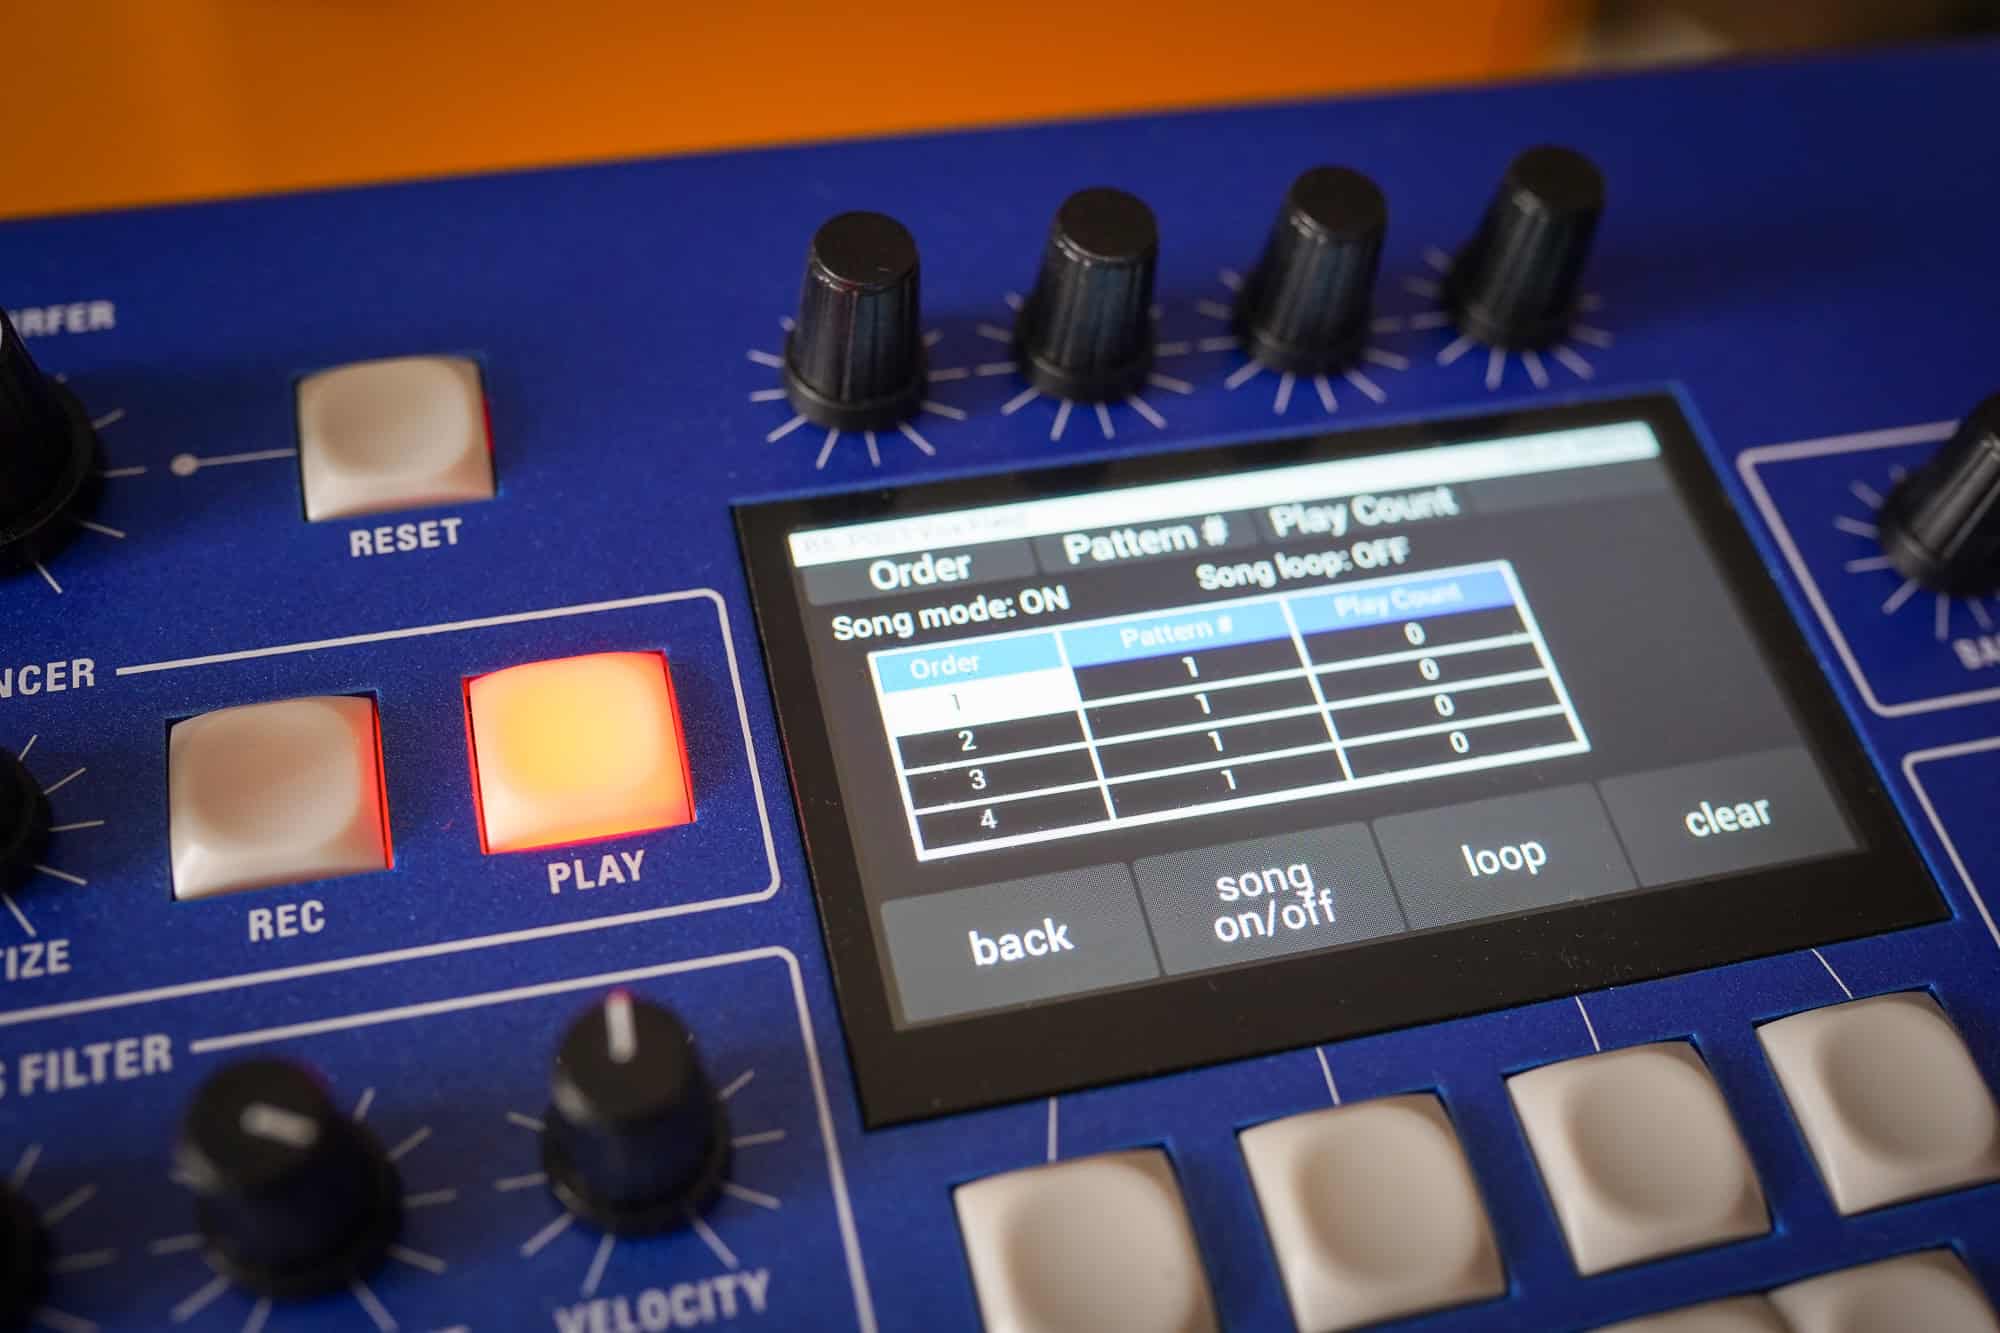
- Press soft button 3 (song). The Song parameters appear.
- Press soft button 2 to turn Song mode on.
- Use soft knob 1 to select the song section (1 to 24). This defaults to section 1.
- Use soft knob 2 to select the pattern number for that section (1 to 24). This defaults to Pattern 1.
- Use soft knob 3 to set the Play Count (1 to 64), the number of times that pattern repeats before moving to the next section.
- Go to the next song section and repeat until you have the patterns arranged as you would like.
- If you want the song to loop, press soft button 3 (loop). The song loops as long as the PLAY button is on.
- When you have arranged your sections, make sure Song mode is on, then press the PLAY button to begin song playback. (With Song mode off, the sequencer plays a single pattern, since that is its default mode.)
- To save the song, save the program by pressing the WRITE button twice.
Ready for a recap? Watch loopop’s overview of the sequencer and more:
Driving external gear, and staying in sync
The 3rd Wave sequencer does not have to be a solo performer. It sends its sequences out over MIDI, so the notes you record can play an external synth or land in another sequencer or a DAW for further work. It also speaks MIDI clock in both directions, so it can be the master clock for a rig of external sequencers and drum machines, or fall in line behind another device that is already running the show. Set MIDI Clock Mode in the GLOBAL menu to out and the 3rd Wave sends clock downstream, so your external gear locks to its tempo. Set it to in, and the 3rd Wave listens instead, syncing to an incoming clock, with an in-tempo-sync option that follows BPM only. Turn on MIDI Start/Stop Sequence and an external transport can start and stop the sequencer, so hitting play on your master device starts the 3rd Wave along with it.
One quick thing worth knowing about that setting: if you press play and the sequencer stays silent, the usual cause is MIDI Clock Mode set to in, where it sits waiting for an external clock that is not arriving. Set it to off or out when you are running on the 3rd Wave’s own clock. Our support pages and the user manual cover the fuller troubleshooting rundown.
Where to go next
The sequencer is where the rest of the 3rd Wave comes together. Multi-parts give you the players, and the synthesis engines give each of them a voice. In the next episode, we dig into one of our favorite sound-design tools, the Wave Envelope, for building timbres that move and evolve on their own. Pair an evolving Wave Envelope patch with a parameter-automated sequence, and you have motion stacked on motion.
Watch the full episode above to see all of this at the instrument, then contact one of our dealers to get your hands on a 3rd Wave in person. For deeper detail on any of the steps out the sequencer, visit our support page for additional resources and to download our reference manuals.
Now go string some patterns together and get into the groove.
We’ll see you in the next one.